The Unload Models plugin will allow BIM professionals to do regular uploads of storage files between folders on a local server or from a revit server to a local server or between two revit servers. Just build a table with the models you want to unload and run the plugin.
1. Preparing Excel file for plugin operation
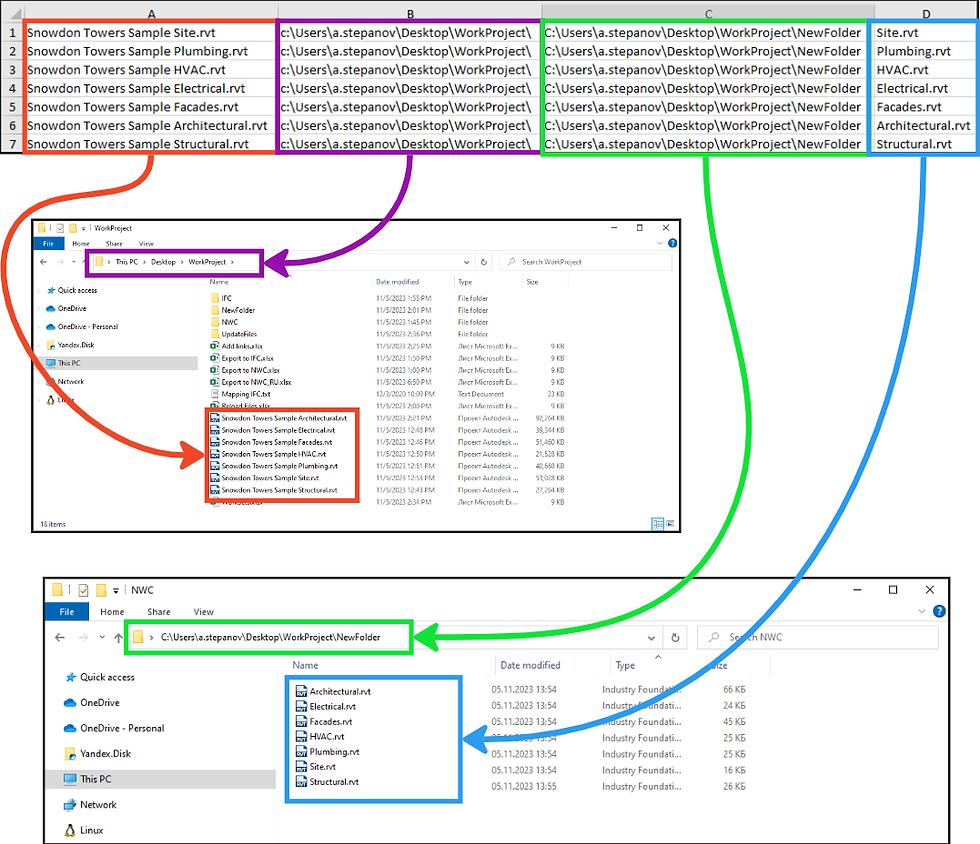
To work with the plugin, you will first need to set up an Excel file in ".xlsx" or ".csv" format as follows:
Obligatory starting from the 1st row!
Column A - Model Name with ".rvt" extension is mandatory
Column B - Path to the location of the Revit model. This can be either the path to local storage or the path to Revit Server. In the case of Revit Server, you need to specify the path in the following format:
RSN://*server name*/*folder name*/.
Column C - Specify the path to the folder or Revit Server where the plugin will need to reload the models.
Column D - (optional field) Specify a new name for the model, if necessary.
Save this file, we will need it for the plugin to work.
2. Plugin operation
After the Excel file is prepared, you can run the plugin. To do this, open Revit, and then either in an open document or just in an open Revit application, go to the BS_Bim tab and run the "Unload models" plugin.
In the opened window you will have to specify a lot of settings. Let's analyze them.
1. Select the ".xlsx" or ".csv" file that you and I collected in the previous step.
2. Select one or more models that the plugin read from the Excel file.
3. If you want to select all models at once, check the "Select all" box.
4. Click the "Unload" button and the plugin starts its work, reloading the models from one place to another.


Comments